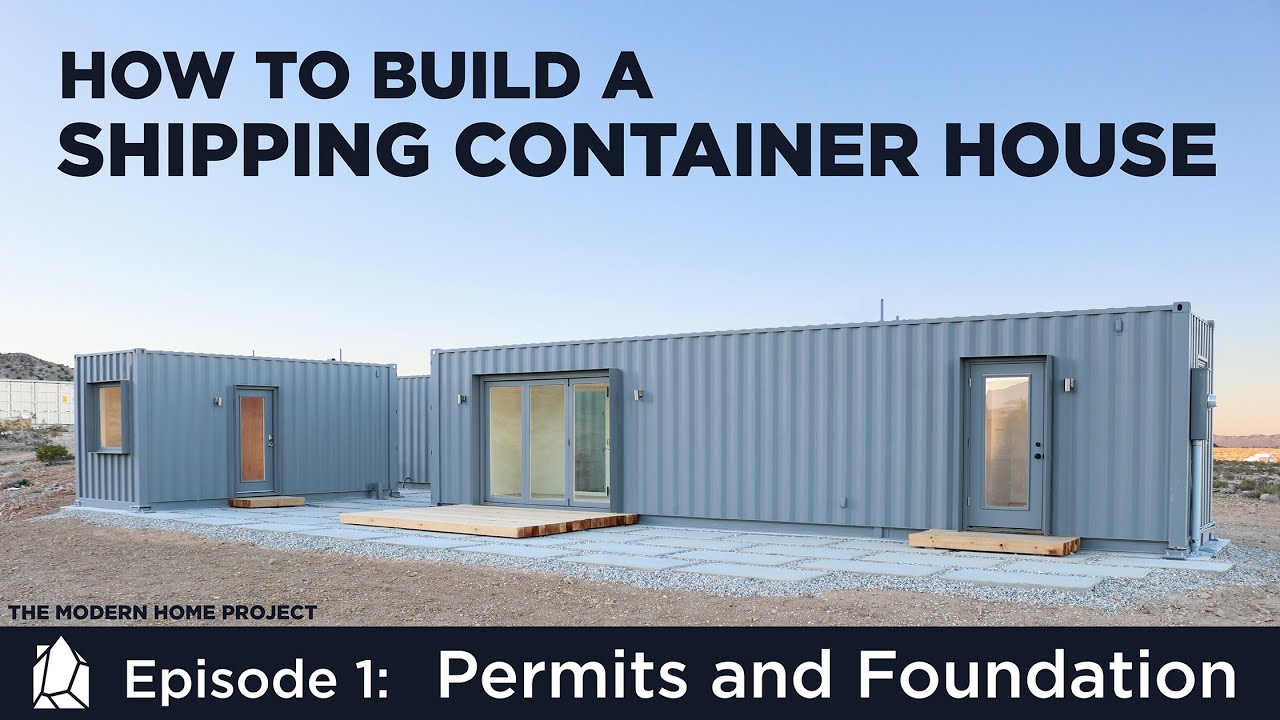
Hi, I’m Ben, and this is the house I built out of shipping containers. Now I’ve been interested in shipping container architecture for quite some time, but I had a really hard time finding good information about how to get building permits or how much would it cost? Well, we did the research, we documented everything that we did and now we’re so excited to share with you what we learned so check it out. This is episode 1, where we’ll talk about buying containers, getting building permits and pouring a concrete foundation in the spring of 2018, I bought 10 acres of land in Joshua Tree California, it’s a square piece of land about 650 by 650 feet, and it has this nice Little mountain right in the middle, while I was waiting for the surveyor to finish up the site drawings. I went ahead and ordered two shipping containers. No, I had heard like a lot of people have that you can get shipping containers for really cheap, but in California you have to use a one trip conditioned container if you’re turning it into a permitted house. This is just so that you can provide documentation for. What’S been inside the container just to ensure that there hasn’t been any radioactive or toxic stuff in there? I also didn’t order typical containers. I ordered hi cubes, which were a foot taller than a standard shipping container. This is gon na give me more room for insulation, running wiring and, of course, because we’re in California sprinkler systems for fire suppression. Originally, I was only planning on using one 40-foot container to build one tiny house, but then I thought it’d be really nice to have a guest bedroom and bathroom for visitors. And then, when I checked in with my local building department, they informed me that there was a 700 square foot minimum for houses, which meant, I would have to add a third container. So I figured a home office and workshop would be great. Now, even before I got the permit, I was allowed to move up to 50 cubic yards of soil, so I went ahead and started flattening out the piece where I wanted to place the house. I rented a bulldozer and hired an operator to flatten out this whole area, and it only took him two days. We then started digging for the monolithic slabs whichare going to support the containers. Originally, we tried to do this with hand tools, but there was so much rock in the soil was really slow going. So we let the machine do the work and do we just use hand tools to clean it up afterwards. Not only are there big chunks of rock mixed into the soil there’s hole veins of stone that go through it. We use to buy lumber to define the perimeter of the slab and we drove stakes into the ground to hold these boards in place. Wood stakes kept breaking, so we switched to these steel stakes that already had holes in them for screws and they worked really well [, Music ]. We had a whole bunch of 20-foot long pieces of rebar delivered to the site and we began to reinforcement for the concrete. The structural engineer had specified the size of the rebar and the layout. So all we had to do was follow those drawings and wire. It all together, I focused on cutting all the short vertical pieces, while the rest of the crew wired them all together. This isn’t the most difficult work, but it does help to have a plan. The whole thing starts to getpretty heavy because you’re, basically creating one big steel,cage of rebar all wired together, [ Music ]. We spread out the 10-millimeter moisture barrier and then shoveled clean sand. On the top of that, I had always wondered how builders keep the rebar from just falling to the bottom of the formwork, and they use these things called Dobies they’re, just little concrete blocks with wires embedded in them, and they act as spacers. This was a lot of work in hundred degree weather, and it really made me appreciate all the stuff that goes on inside a monolithic piece of concrete. Originally, we planned on embedding all of the drain pipes for the plumbing into the concrete slab, but after laying out all the pieces and wrestling around trying to get them in the right position relative to the rebar, we just felt we weren’t gon na be accurate enough To line it up with exactly where the container would need to be, so we just switched it out for a simpler option and just made the final drain go through the slab. This just means we’ll have to do the plumbing within the floor of the container itself. Now this is as far as we can go before, having the building permits. We certainly can’t pour any concrete until we get the final sign-off. California is a pretty regulation, intensive state and here’s the process we had to go through the process starts with getting the site surveyed. In addition to measuring and marking out the topographical features, which is really useful for showing how the site will drain the surveyor, also researches the history of the site and defines all the boundaries and setbacks next up came the preliminary architectural design where we laid out all The spaces and features this design then goes to the structural engineer, who creates a set of structural details and performs calculations to prove that this building will meet all the code requirements. The building department gave us the option of either having the architect or engineer stamp the drawings. We then compiled these designs into the construction documents and added in a whole series of reports and studies and forms that are all required by San Bernardino County is a complicated and expensive process, because, with each step, you often have to go back to the previous one And have those drawings or documents updated all right done with permits time to have some fun and it’s concrete day we have three separate slabs and the smallest one is inaccessible for a truck to pull all the way up to so we’re gon na have to pump The concrete the crew got there a few hours ahead of the trucks just to make sure everything was good with the forms and to spray them down with water. The first truck pulled up to the pump and started releasing concrete into the hopper. It then gets pumped through the hose and delivered into the forms. There was only the few guys standing around with shovels, fill in the gaps with the form with dirt and rocks as the concrete levels rose. This wasn’t exciting, but a little bit stressful today, because you have to order all the trucks in advance and they kept coming about 15 minutes apart. So we had to make sure we were emptying one so that we’d be ready for the next one. The gray plastic pipes that are sticking up out of the forms are PVC conduit that will allow us to run electrical lines between the containers. Now the majority of these slabs are going tobe covered by the containers, but we still had them smoothed out a bit. Pretty other slabs, the trucks could just back all the way up and the concrete could just come right down the chute [ Music ] altogether. We used about six trucks and 45 yards of concrete. In addition to smoothing out the top surface, the guys also created some lines through the surface of the concrete. These are to create control joints which will allow for more expansion and contraction of the concrete without creating unwanted cracks. We also use some plywood boxes to create some openings in the slab, and this is just giving us a little bit more room to line up where the drain for the toilet goes. The last thing we did was to use an edging tool to do a little bit of a round over at the edges of each slab. So the most common question I’ve gotten so far is: why did I choose to do a slab on grade Foundation and I get it? It seems like an awful lot of concrete for a container which is self-supporting. Well slap. One grade isn’t the first choice that I had. I originally wanted to do sort of a pier Foundation and I was very concerned with how I would level it since I don’t have a lot of experience, sort of setting these things, and so I was interested in doing some concrete piers with a steel beam that I could then level on site that I would weld the container to so that I sketched it out and sent it to the structural engineers. Well, they were initially worried about lateral support. Considering seismic activity were in California, we have to worry about earthquakes and with seismic activity,you have to worry about the lateral load of the foundation, not just about how it takes weight straight down. So we then worked on a second version of this design, where we connected the footings underneath the concrete columns so that it creates sort of a ring, and that add, would add enough strength and stability. But when I talked to the building department, they said that this would be classified as a crawlspace or at least at the area underneath the container would, and if that was the case, it would have to be at least 18 inches between the bottom of the container And the finished dirt and the container floor itself is pretty thick, and so I didn’t want to have my finished floor to be almost two to two-and-a-half feet off of the ground, because then, if I do any decks or staircases out, I have to have all these Rail which blocked the views so at this point, considering both the challenges for what it was originally a really simple foundation, adding in seismic support and then and knowing that I’d have to raise the finished floor way off the ground. I scrapped this idea and started thinking about monolithic, concrete foundations. Now, first, I said well, can I just do a perimeter beam that goes all the way around. It doesn’t really need to have a concrete top right, like the containers only sitting on those edges. So the engineers worked it out, but that concrete ridge beam because again it doesn’t have the lateral support from the actual top of the slab. What had to be pretty thick. So it ended up not being that much more concrete than just doing an entire slab, and when you actually look at how much concrete is per yard, it was like a cost difference of like a hundred dollars per slab. Now that doesn’t mean the slab is the best idea, I’m sure there’s a lot of other foundation types that would have worked on, but with what we were working on here with this particular building department and maybe just the limitations of our structural engineering firm. This is what seem to make the most sense across the most basis ease, even though it didn’t really seem perfect for any one thing now my architecture, firms in Boston on the East Coast and a lot of our work is out there. So we’re used to doing basements or foundations that go well below the frost line, but out here in Southern California, that’s less of a concern. So at least we had that going for us, which made the foundation a lot easier and relatively affordably priced. I know there’s a lot of Engineers, architects and builders out there in the audience. So let me know in the comments section below what you think would work or would have worked better for this type of foundation, also any little tricks or tips that you might have for the rest of the audience about foundation. Design form work. What to consider when doing big concrete pours like that would also be appreciated, so I hope that clears it up why we ended up going with a slab on grade foundation. I know when you see houses like this a lot, so many decisions seem arbitrary and I’m looking at architecture all the time being like. Why did they do that? But before you sort of assume that somebody’s dumb, although probably plenty of other reasons to do so, ask them why? Because there’s always these other considerations that we may not see just by looking at the photograph on the next episode of the modern home project, we’re in a renault crane, moved the containers and start cutting out the holes for the windows and doors make sure you subscribe To this channel and turn on notifications, so you don’t miss an episode, we’ll be posting additional information, including the architectural drawings, on our website, thanks for watching and follow us on Instagram. If you want to see what we’re working on next
Your turn
Turn the inspiration into a real plan.
Tell us what you are building and where. Our team will send a free, no-obligation build plan — including how to protect the steel for the long haul.
Builds, costs and hard-won lessons — once a month.
Join the list for new project breakdowns, buying checklists and our Container Build Starter Kit.
We use cookies on our website to give you the most relevant experience by remembering your preferences and repeat visits. By clicking “Accept All”, you consent to the use of ALL the cookies. However, you may visit "Cookie Settings" to provide a controlled consent.
This website uses cookies to improve your experience while you navigate through the website. Out of these, the cookies that are categorized as necessary are stored on your browser as they are essential for the working of basic functionalities of the website. We also use third-party cookies that help us analyze and understand how you use this website. These cookies will be stored in your browser only with your consent. You also have the option to opt-out of these cookies. But opting out of some of these cookies may affect your browsing experience.
Necessary cookies are absolutely essential for the website to function properly. These cookies ensure basic functionalities and security features of the website, anonymously.
Cookie
Duration
Description
cookielawinfo-checkbox-analytics
11 months
This cookie is set by GDPR Cookie Consent plugin. The cookie is used to store the user consent for the cookies in the category "Analytics".
cookielawinfo-checkbox-functional
11 months
The cookie is set by GDPR cookie consent to record the user consent for the cookies in the category "Functional".
cookielawinfo-checkbox-necessary
11 months
This cookie is set by GDPR Cookie Consent plugin. The cookies is used to store the user consent for the cookies in the category "Necessary".
cookielawinfo-checkbox-others
11 months
This cookie is set by GDPR Cookie Consent plugin. The cookie is used to store the user consent for the cookies in the category "Other.
cookielawinfo-checkbox-performance
11 months
This cookie is set by GDPR Cookie Consent plugin. The cookie is used to store the user consent for the cookies in the category "Performance".
viewed_cookie_policy
11 months
The cookie is set by the GDPR Cookie Consent plugin and is used to store whether or not user has consented to the use of cookies. It does not store any personal data.
Functional cookies help to perform certain functionalities like sharing the content of the website on social media platforms, collect feedbacks, and other third-party features.
Performance cookies are used to understand and analyze the key performance indexes of the website which helps in delivering a better user experience for the visitors.
Analytical cookies are used to understand how visitors interact with the website. These cookies help provide information on metrics the number of visitors, bounce rate, traffic source, etc.
Advertisement cookies are used to provide visitors with relevant ads and marketing campaigns. These cookies track visitors across websites and collect information to provide customized ads.